

Last Updated: October 24, 2026
Quick Summary
To organize wedding keepsakes, gather all items in one place, sort them into categories like paper, textiles, photos, and decorative pieces, then store them in acid-free boxes with clear labels and a master catalog. Use multiple backups for digital files and avoid common mistakes like regular plastic storage, attics, or basements.
- Gather everything in one place and sort into five categories: paper items, textiles, photos and videos, decorative pieces, and sentimental gifts.
- Choose acid-free archival boxes or decorative containers and organize contents by category using dividers or smaller boxes inside.
- Create at least three backups of digital files: one on your computer, one on an external hard drive, and one in cloud storage.
- Label every box clearly and maintain a master catalog listing contents, storage location, and special handling notes.
- Avoid storing keepsakes in attics or basements where temperature and humidity fluctuate, and never use regular plastic for long-term storage.
Table of Contents
- Step 1: Gather and Sort All Your Wedding Keepsakes
- Step 2: Decide What to Keep After Your Wedding
- Step 3: Create Wedding Memory Box Ideas That Work for You
- Step 4: How to Store Wedding Photos Safely and Accessibly
- Step 5: Implement Wedding Decor Storage Ideas for Reusable Items
- Step 6: Label, Catalog, and Back Up Your Organization System
- Step 7: Common Mistakes to Avoid When Organizing Keepsakes
- Frequently Asked Questions
Step 1: Gather and Sort All Your Wedding Keepsakes
The first step to organize wedding keepsakes is simple: collect everything in one place. Pull out invitations, programs, napkins, favors, thank-you cards, photos, videos, and any decorative items you want to keep. Don't worry about organizing yet, just gather.
Set aside a large table or clear floor space. Spread everything out so you can see what you have. This visual inventory matters. You'll spot duplicates, damaged items, and pieces you forgot about.
As you gather, sort into rough categories:
- Paper items (invitations, programs, menus, cards)
- Textiles (dress, veil, fabric swatches, linens)
- Photos and videos
- Decorative pieces (centerpieces, flowers, favors)
- Sentimental gifts (toasts written down, guest book, letters)
Many couples find this step takes longer than expected because memories surface as they handle each item. That's normal. Take your time. The goal isn't speed, it's completeness.
The Smithsonian's guide to preserving wedding memorabilia recommends handling delicate items with clean hands and avoiding plastic bags for long-term storage, since moisture can damage fabric and paper.
You might also want to reference DIY wedding organization for busy couples for broader strategies on managing all your wedding details efficiently.
Step 2: Decide What to Keep After Your Wedding
Not everything deserves permanent storage. Be intentional about what to keep after your wedding.
Ask yourself these questions for each item:
- Does this bring back a specific happy memory?
- Will I want to revisit this in five years? Ten years?
- Is this item in good condition?
- Does it represent something meaningful about the day?
Be honest. Keeping everything creates clutter. Keeping only what matters creates a collection you'll actually treasure.
Items worth keeping typically fall into these categories:
- Your wedding dress or a fabric swatch
- Professional photos and videos
- The invitation and program
- Guest book or written messages
- Your marriage license
- Flowers or botanical keepsakes (pressed flowers, dried bouquet)
- Meaningful gifts from guests
- Decorative items that match your home style
Items you can probably discard:
- Duplicate programs or napkins
- Wilted or damaged flowers
- Single-use favors (unless sentimental)
- Extra place cards or escort cards
- Broken or stained linens
This decision phase prevents you from storing items you'll never look at again. A smaller, curated collection is easier to organize and preserve.
Step 3: Create Wedding Memory Box Ideas That Work for You
A wedding memory box is a dedicated container for your keepsakes. It becomes the home for your most treasured items.
Choose a box that fits your style and space. Options include:
- Acid-free archival boxes (best for preservation)
- Decorative wooden boxes
- Vintage suitcases
- Custom memory boxes designed for weddings
- Sturdy cardboard boxes lined with acid-free tissue
The box itself should be acid-free and lignin-free to protect items from yellowing and deterioration over time. Size matters too. A box that's too large encourages overstuffing. One that's too small forces difficult choices.
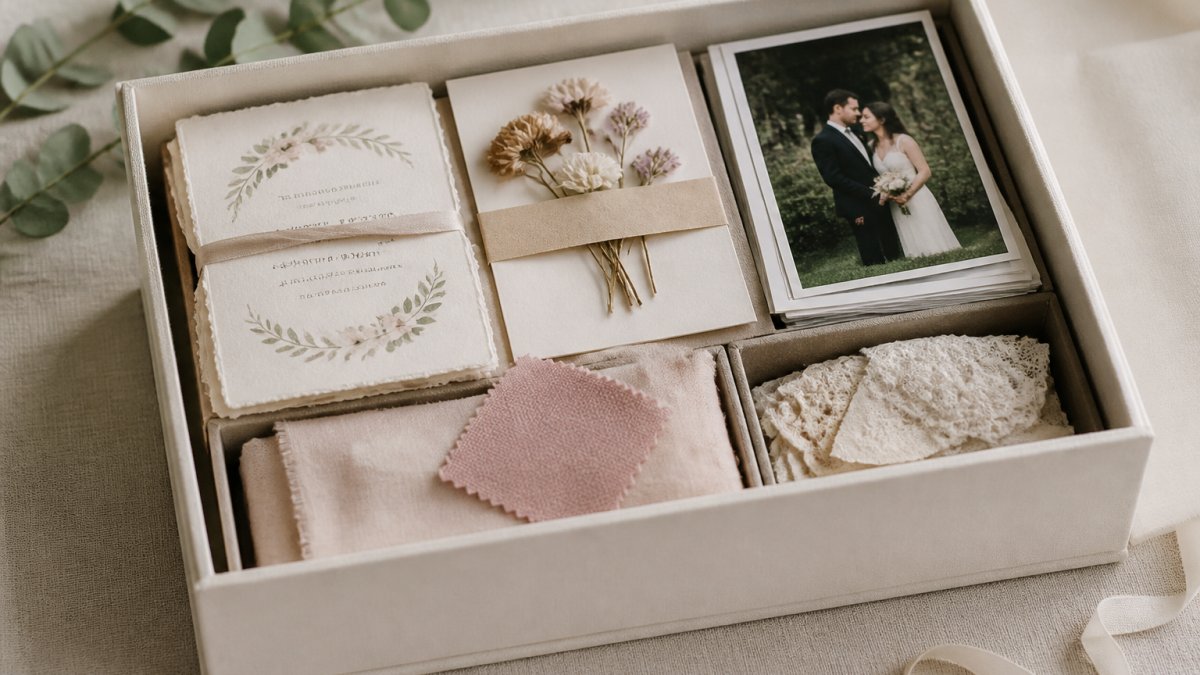
Inside the box, organize items by category using dividers or smaller boxes:
- Dress and textiles in one section
- Photos and videos in another
- Paper items together
- Decorative pieces separately
Many couples layer acid-free tissue paper between items to prevent direct contact and damage.
Physical Memory Boxes vs. Digital Organization
Some couples prefer physical boxes. Others go digital. Many use both.
Physical memory boxes work well if you:
- Love holding and touching your keepsakes
- Want a tactile experience when revisiting memories
- Prefer not managing digital files
- Value the ritual of opening a box
Digital organization works better if you:
- Have limited storage space
- Want backups that can't be damaged by water or time
- Plan to share memories with family
- Prefer searchable, organized files
A hybrid approach often works best. Store your dress and fragile items physically. Digitize photos, videos, and paper items. This gives you the best of both worlds: preservation and accessibility.
Step 4: How to Store Wedding Photos Safely and Accessibly
Your wedding photos and videos need special care. They're irreplaceable.
Start by backing up all digital files immediately. Create at least three copies:
- One on your computer
- One on an external hard drive
- One in cloud storage
This protects against loss from device failure, accidents, or disasters.
For printed photos, store them in:
- Acid-free photo boxes
- Archival-quality sleeves
- Away from direct sunlight
- In a cool, dry place (not attics or basements where temperature and humidity fluctuate)
Never store photos in regular plastic sleeves or albums. Regular plastic breaks down and damages photos over time (Information Leaflet on the Care, Handling, and Storage of Photographs - Collections Care...).
Label everything clearly with dates. Include a printed index of digital files. This saves you hours of searching later.
Consider creating a photo album or coffee table book from your best shots. A physical album becomes something you'll actually flip through, unlike digital files buried in folders.
Step 5: Implement Wedding Decor Storage Ideas for Reusable Items
Reusable decor items deserve smart storage so you can use them again.
Separate reusable decor from one-time-use items:
- Reusable: candleholders, vases, lanterns, frames, linens
- One-time: fresh flowers, custom signage, escort cards
Store reusable pieces in labeled bins or boxes. Group by type:
- All glassware together
- All linens together
- All metal pieces together
Wrap fragile items in bubble wrap or tissue paper before packing. This prevents chips and cracks.
Keep an inventory list of what's stored where. When you host another event or help a friend plan, you'll know exactly what you have.
For inspiration on how to repurpose these items, check out DIY wedding decor ideas on a budget to remind yourself what you have and how to use pieces in new ways.
Step 6: Label, Catalog, and Back Up Your Organization System
A well-organized system means nothing if you can't find anything later.
Label every box, bin, and container clearly:
- Use a permanent marker or label maker
- Include the contents and date
- Make labels large enough to read easily
Create a master catalog. This can be:
- A simple spreadsheet listing each box and its contents
- A photo inventory (take pictures of box contents)
- A handwritten notebook
- A digital document stored in multiple places
The catalog should include:
- Box number or name
- Contents list
- Storage location
- Date stored
- Any special handling notes
Back up your catalog in at least two places. Email it to yourself. Store it on a cloud service. Print a copy. This ensures you always have access.
For a stress-free approach to cataloging and managing your system, learn more about organizing wedding details without stress.
Step 7: Common Mistakes to Avoid When Organizing Keepsakes
Learn from others' missteps when organizing wedding keepsakes.
Mistake 1: Using regular plastic storage. Plastic breaks down and damages photos, textiles, and paper. Always use acid-free materials.
Mistake 2: Storing in attics or basements. Temperature and humidity swings destroy delicate items. Choose a cool, dry closet or interior room instead.
Mistake 3: Keeping everything. More isn't better. A curated collection of meaningful items beats a box of clutter.
Mistake 4: Not labeling anything. Future you won't remember what's in each box. Label everything.
Mistake 5: Forgetting to back up digital files. One device failure loses everything. Create multiple backups immediately.
Mistake 6: Storing wet or damp items. Make sure everything is completely dry before packing. Moisture causes mold and mildew.
Mistake 7: Stacking boxes too high. Heavy boxes on top damage items below. Stack thoughtfully or use shelving.
Mistake 8: Never revisiting your system. Check on your keepsakes annually. Verify backups work. Move items if conditions change.
Organizing wedding keepsakes after the ceremony takes time, but it's worth the effort. You've invested months in planning your wedding. Spend a weekend preserving those memories properly.
Start with gathering and sorting. Move through each step at your own pace. The goal is a system that works for your life and your space. Whether you choose physical boxes, digital storage, or both, the key is being intentional about what you keep and how you protect it.
Ever After Suite helps busy couples manage every detail of their wedding journey, from planning to the big day. With structured organization tools and templates, you can apply the same clarity you used planning your big day.
Couples often make these mistakes when storing wedding keepsakes, each with a simple fix.
| Mistake | Cause | Fix |
|---|---|---|
| Using regular plastic storage | Plastic breaks down over time | Use acid-free materials instead |
| Storing in attics or basements | Temperature and humidity fluctuate | Choose a cool, dry closet or interior room |
| Keeping everything | More items create clutter | Curate a collection of meaningful items only |
| Not labeling anything | Future confusion about contents | Label every box, bin, and container clearly |
| Forgetting to back up digital files | One device failure loses everything | Create multiple backups immediately |
| Storing wet or damp items | Moisture causes mold and mildew | Ensure everything is completely dry first |
| Stacking boxes too high | Heavy boxes damage items below | Stack thoughtfully or use shelving |
| Never revisiting your system | Backups may fail or conditions change | Check keepsakes annually and verify backups |
Frequently Asked Questions
What wedding items should you keep after the ceremony?
Keep items with sentimental value and durability: your invitation, first-dance photos, thank-you cards from guests, the groom's boutonniere, your veil or tie, programs, and guest book. Include any handwritten notes or special mementos from family members. Skip single-use items like napkins or cheap decorations unless they hold personal meaning. The key is choosing pieces that tell your wedding story and will survive storage without deteriorating.
How do you organize wedding keepsakes so they're easy to find later?
Group keepsakes by category: photos, documents, fabric items, and miscellaneous mementos. Use acid-free boxes and labeled dividers within each section. Create a simple inventory list (digital or printed) noting what's stored where. This system prevents you from opening boxes repeatedly to search for one item. Many couples photograph their organized keepsakes before storing them, creating a visual reference guide.
How should you store wedding photos, cards, and paper keepsakes?
Use acid-free storage boxes and archival-quality sleeves for photos to prevent yellowing and deterioration. Store paper items like invitations and cards flat in acid-free folders. Keep everything in a cool, dry place away from direct sunlight, moisture, and temperature fluctuations. Consider creating digital backups of important photos and documents as insurance against physical damage. Avoid plastic bags or regular cardboard, which can trap moisture and cause mold.
What's the best way to preserve a wedding bouquet?
Hang-dry your bouquet within 24 hours by tying the stems loosely and suspending it upside-down in a dark, dry, well-ventilated space for 2-3 weeks. Once fully dried, store it in an acid-free box with tissue paper in a cool, dark location. Alternatively, press individual flowers between acid-free paper in a heavy book for 2-4 weeks, then store them flat in archival folders. Both methods preserve the bouquet's form and color far better than fresh storage.
